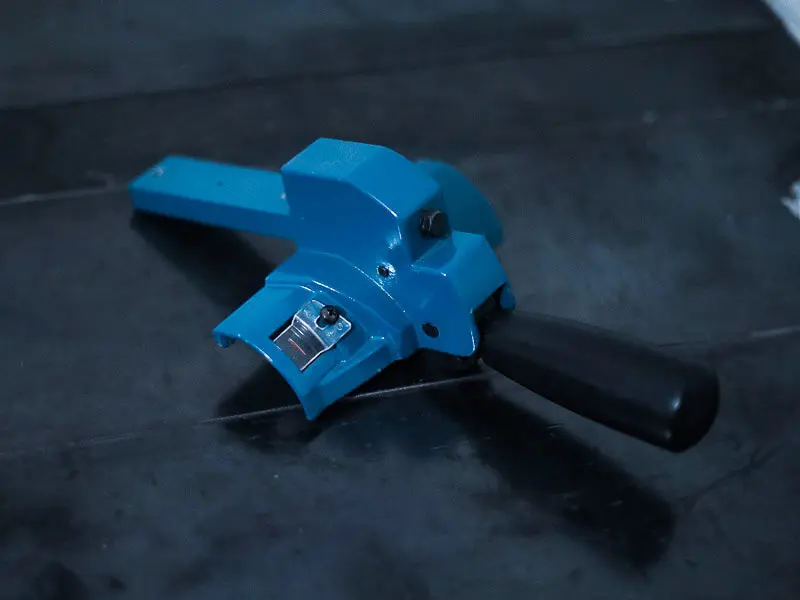
Makita MLT100N Rip Fence
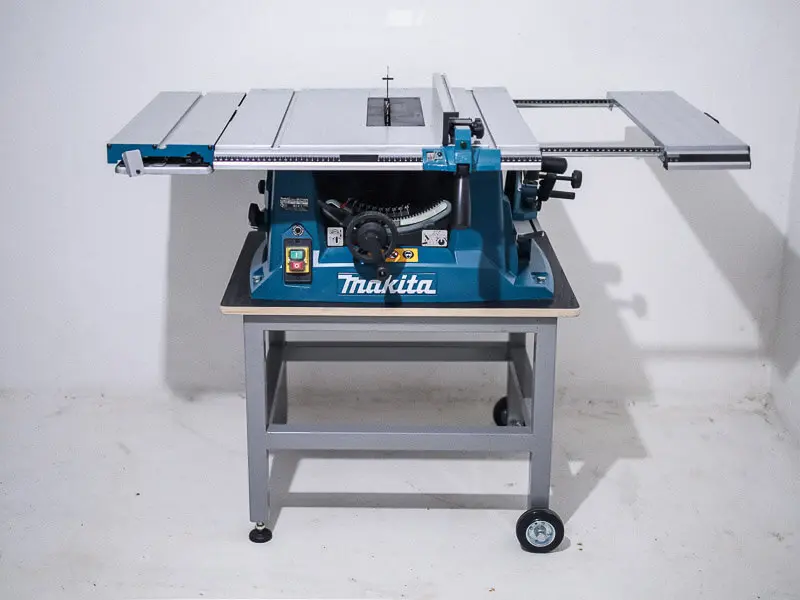
Introduction
This page provides detailed plans for creating a custom rip fence to improve the Makita MLT100N table saw. The original rip fence design is inadequate, resulting in uneven cuts. The solution presented here involves creating custom parts and incorporating additional aluminum profiles to create a more stable and reliable guide. All necessary parts and instructions are included, making this a great DIY project for woodworking enthusiasts.
Why the Original Rip Fence Sucks?
Because it is fixed only in the front (cantilever analogy). The design isn't sturdy enough to withstand forces when cutting wood - it will move and bounce, resulting in a poor, uneven cut.
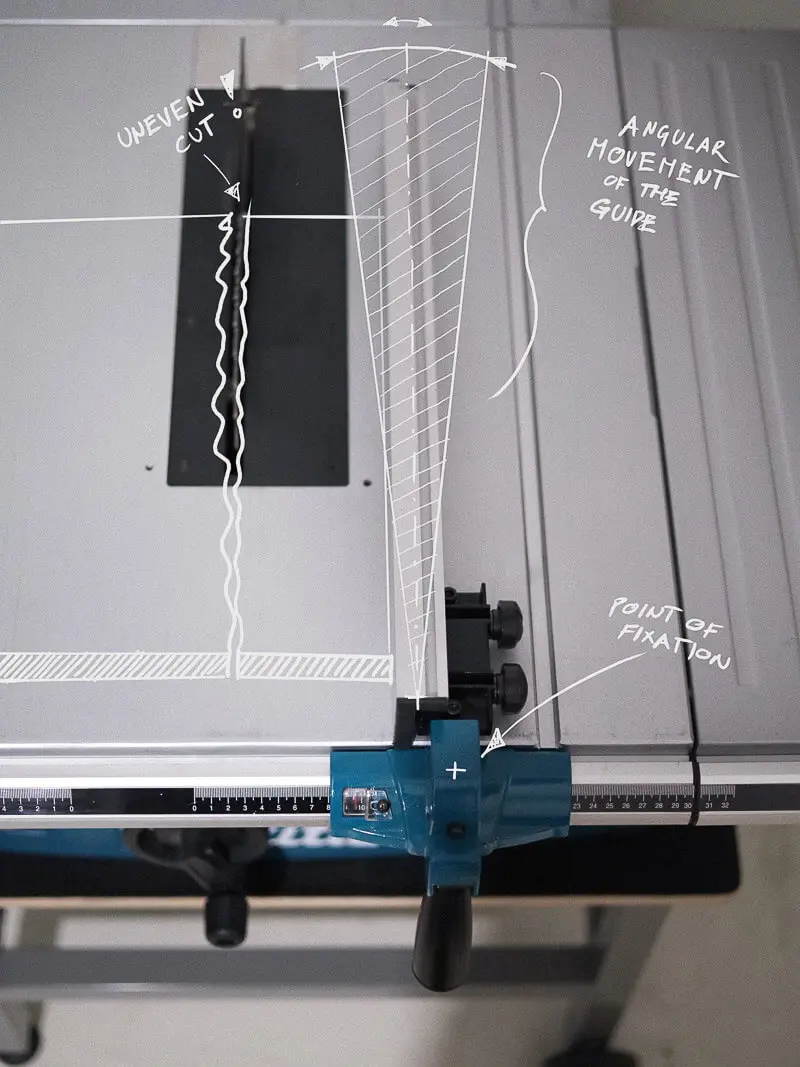

Solution
The logical solution would be to add a point of fixation on the other end of the guide. But the Aluminium profile isn't long enough, nor is there anything you could attach it to. Additionally the profile is weird in shape, lacking any useful slots or threads.
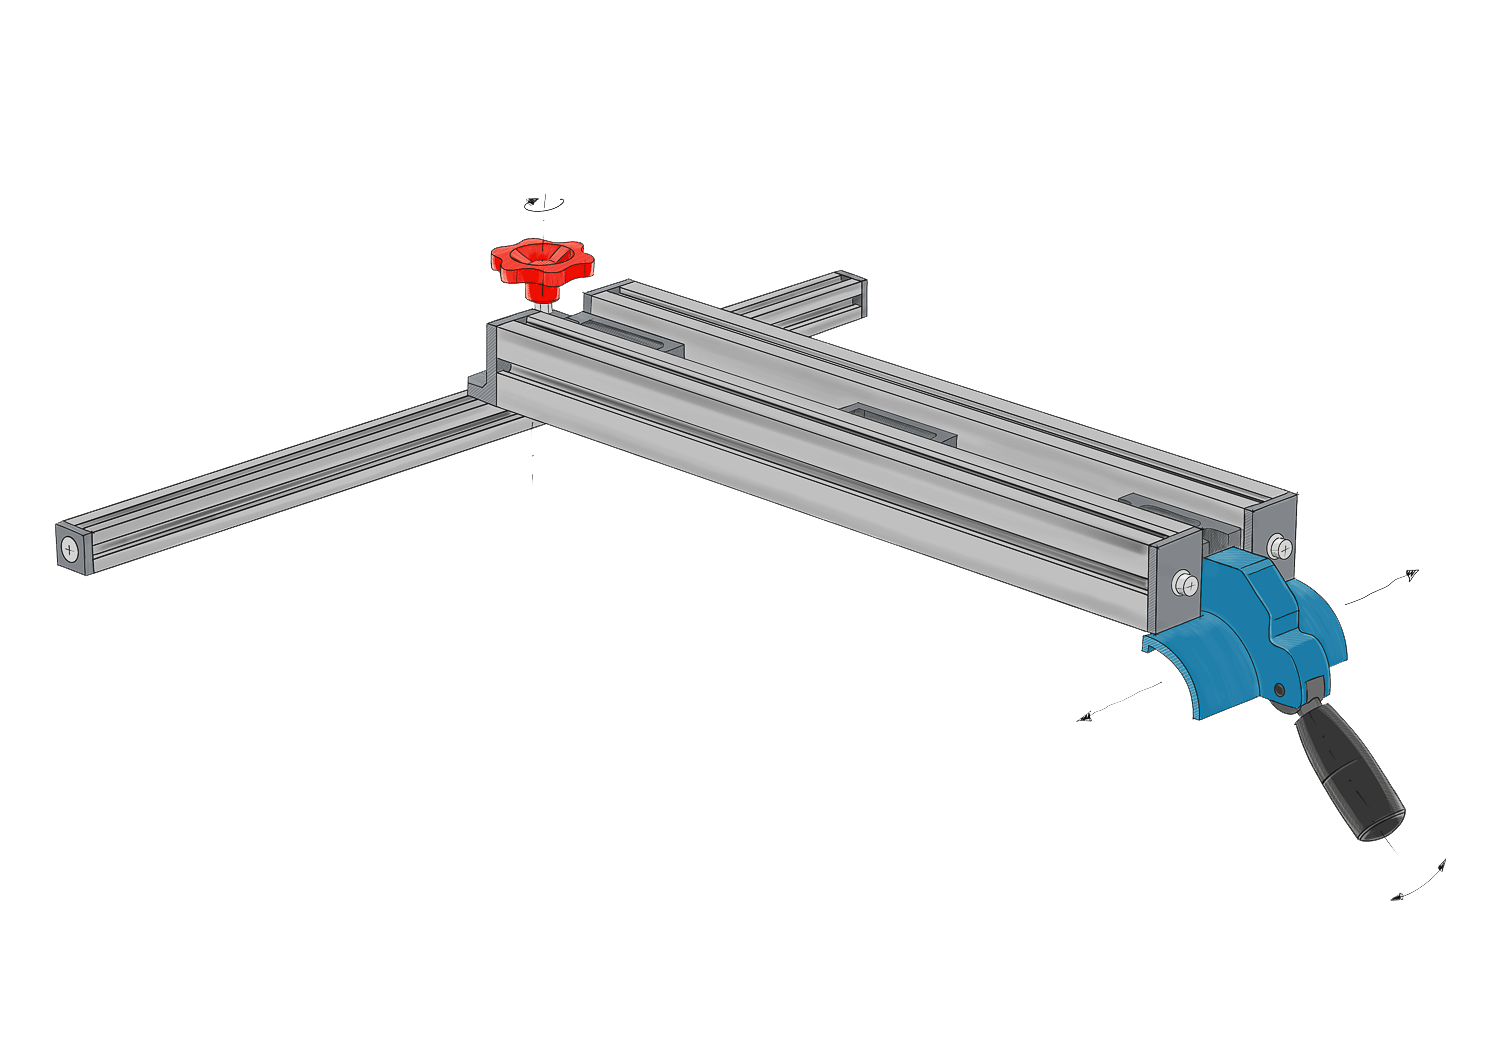
Given all that, I gave it a bit of thought and come up with a simple design that is rock solid, easy to assembly, and proven to give satisfying cuts.
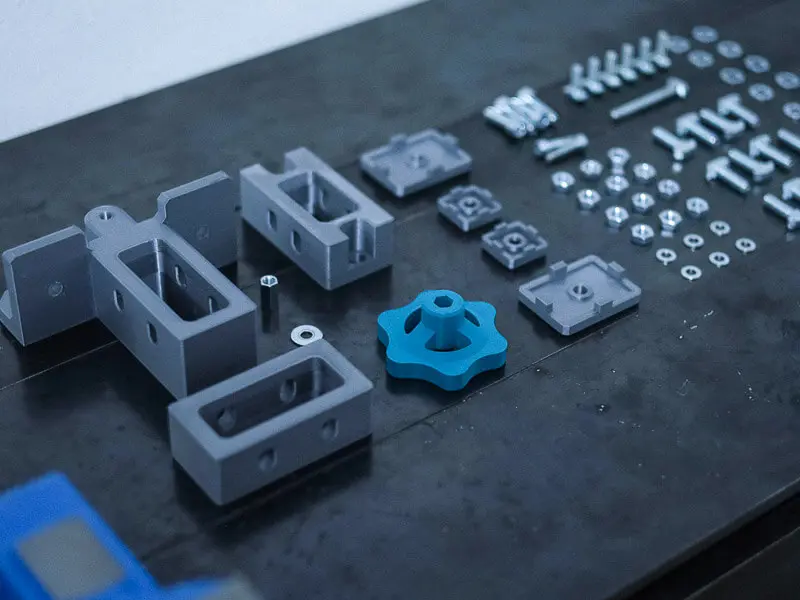
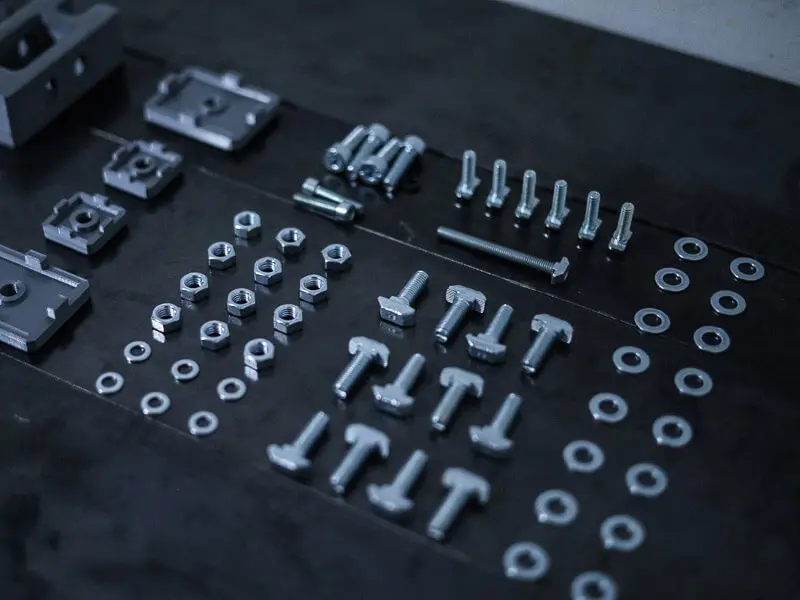
Parts
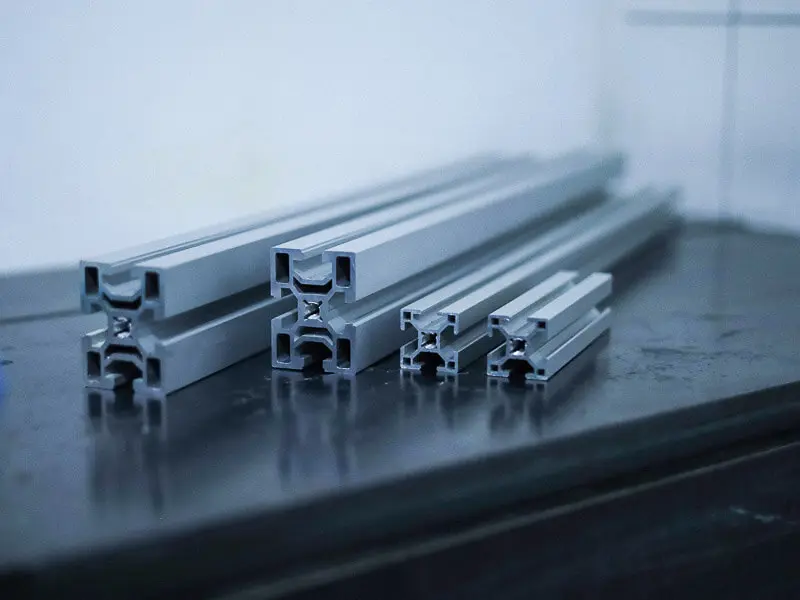
The only original part you'll keep is the blue handle. As for the rest, you'll need eight custom parts (either 3D printed or CNC milled), four pieces of common aluminum profiles and some fittings.
Where to buy aluminum profiles and fittings?
| Part | Standard | Quantity | Price [EUR] |
|---|---|---|---|
| Hammer Head screw, U10/M8×25 | / | 12 | 4.68 |
| Hammer Head Screw, U8/M6×20 | / | 6 | 5.04 |
| Hammer Head Screw, U8/M6×60 | / | 1 | 0.97 |
| Screw, Countersunk Head M4×8 | / | 1 | 0.22 |
| Screw, Countersunk Head M8×20 | / | 2 | 0.68 |
| Screw, Cylindrical Head, M6×25 | DIN 912 | 2 | 0.22 |
| Screw, Cylindrical Head, M8×25 | DIN 912 | 4 | 0.24 |
| Hexagonal Nut (long) M6 | DIN ISO 6334 | 1 | 0.43 |
| Hexagonal Nut M6 | DIN 934 | 6 | 0.3 |
| Hexagonal nut, M8 | DIN 934 | 12 | 1.32 |
| Washer (wide), 6.4 | DIN 9021 | 1 | 0.07 |
| Washer, 6.4 | DIN 125 | 8 | 0.16 |
| Washer, 8.4 | DIN 125 | 16 | 0.48 |
| ALU Profile 30×30, 140 mm | / | 1 | 0 |
| ALU Profile 30×30, 600 mm | / | 1 | 5.26 |
| ALU Profile 45×60, 610 mm | / | 2 | 35.53 |
| 3D Printed/CNC Milled Parts | / | 8 | 10 |
| ABS Slider | Original Makita Part | 1 | 0 |
| Handle | Original Makita Part | 1 | 0 |
Downloadable Content
Find all the custom parts files attached here. Just
download all the .stl files, and send them to
your 3D printer service. Make sure to keep the infill density
high. I recommend the following printing settings: layer height: 0.3 mm, extrusion width: 0.5 mm,
infill density: 50%, perimeters: 5.
In case you're doubting the rigidity of 3D printed
parts, download the .step files instead and CNC
mill them out of MDF
(medium density fiberboard), plywood or
aluminium.
STL Files
STEP Files
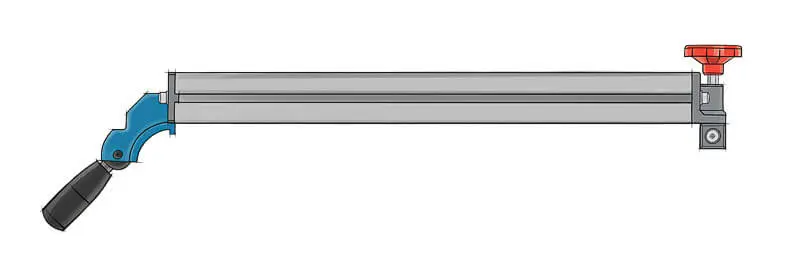
Final Assembly (CAD)
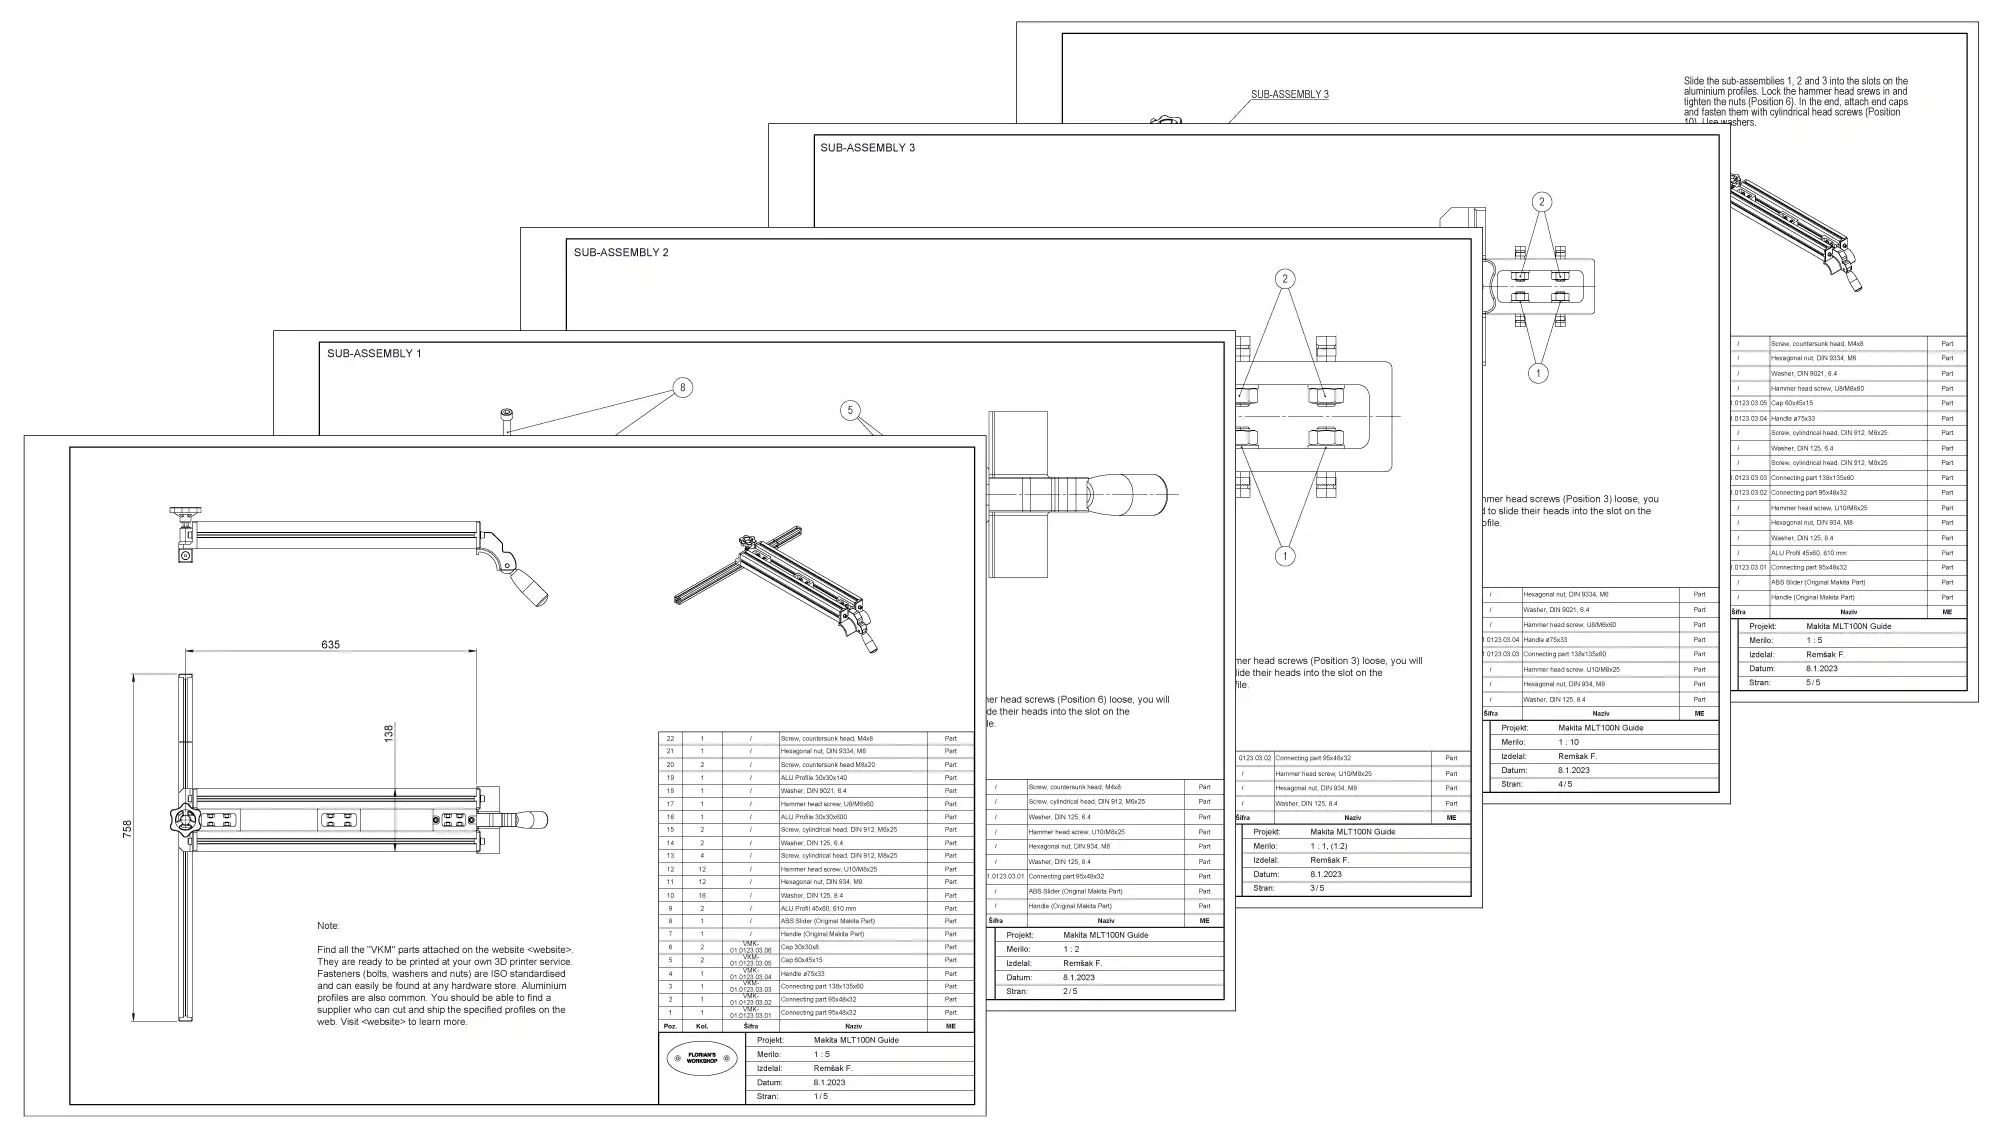
Assembly Instructions
I made a thorough instructions of how to put the whole thing together. Print the pdf document and follow along.
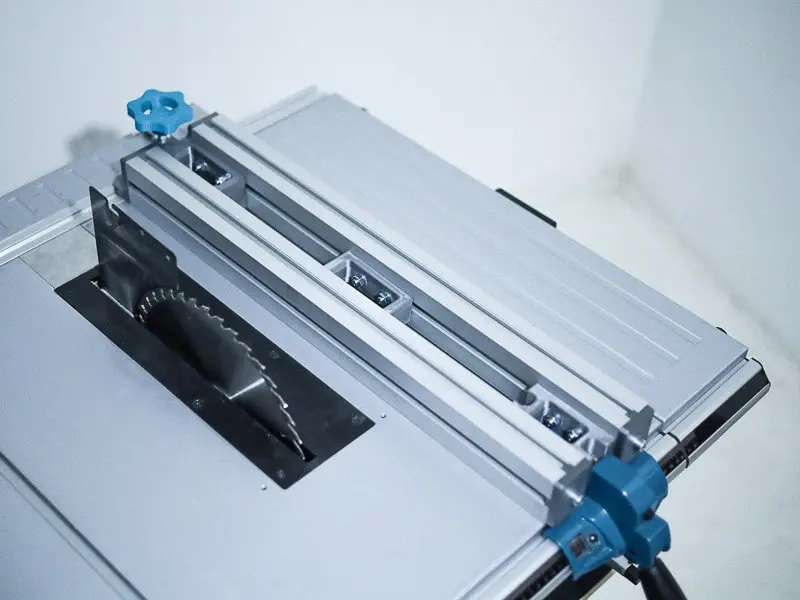
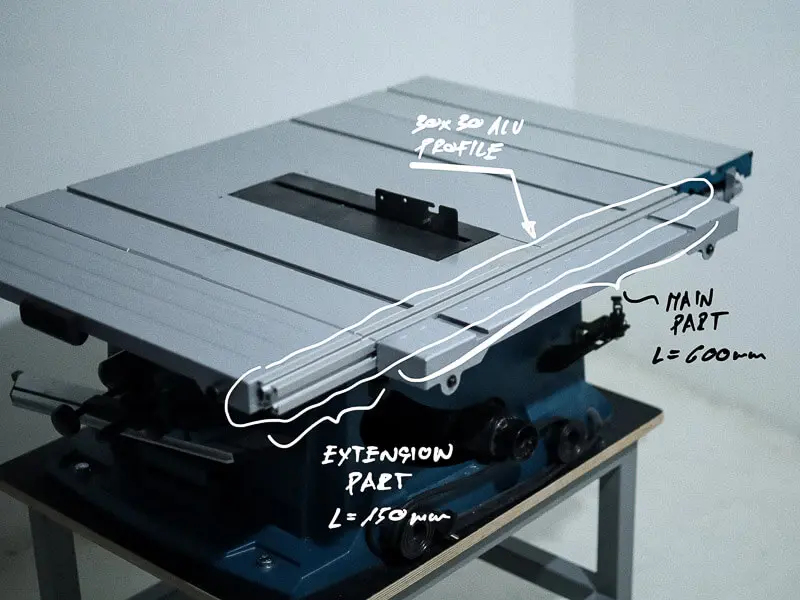
Mounting Back Rail
Once you finish building the rip fence, you'll need to add the 30×30 600 mm and 150 mm aluminum profiles on the back-end of the table. This will serve as a rail for adjusting the width of your cuts precisely.
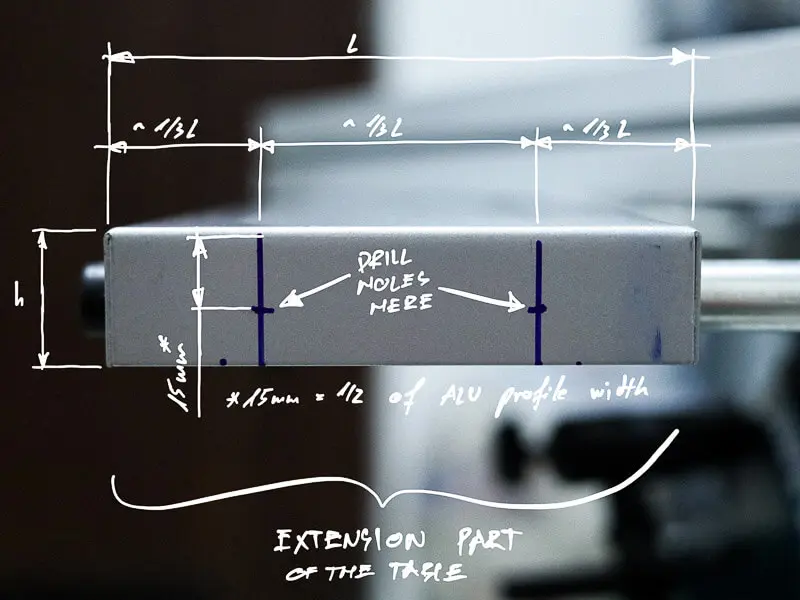
You will need to drill six holes yourself. Aluminum is a soft metal, and drilling through should be easy.
How to drill metals?
- Make a mark where you need to drill.
- Use a position tool to punch a small dent for easier drill initiation.
- Use sharp drills bits made for drilling metals. Use a slightly larger diameter drill bit.
🧑🔧 Tip: I used ⌀9 mm drill bit to enable enough freedom of movement when aligning the profile with the table's top surface later in the process.
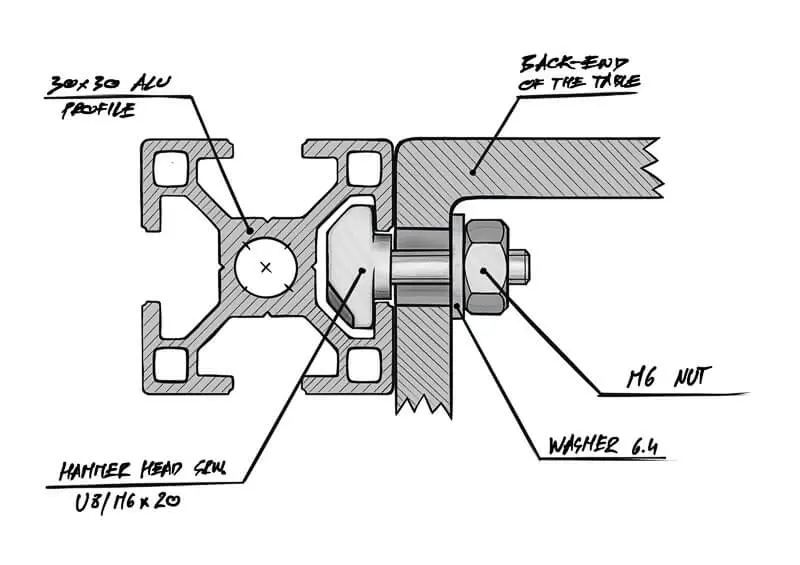
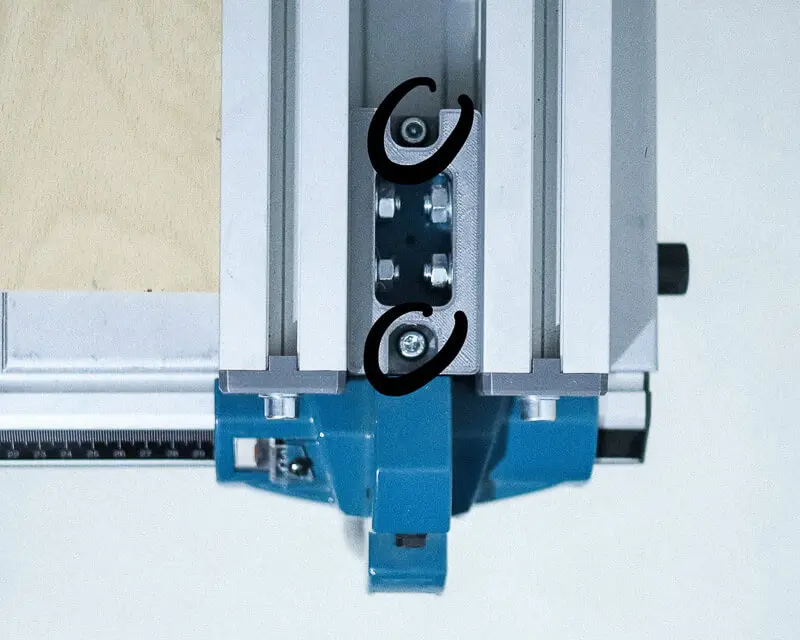
Once done with drilling, attach the aluminum profiles using six hammer head screws U8/M6×20, M6 nuts and 6.4 regular washers.
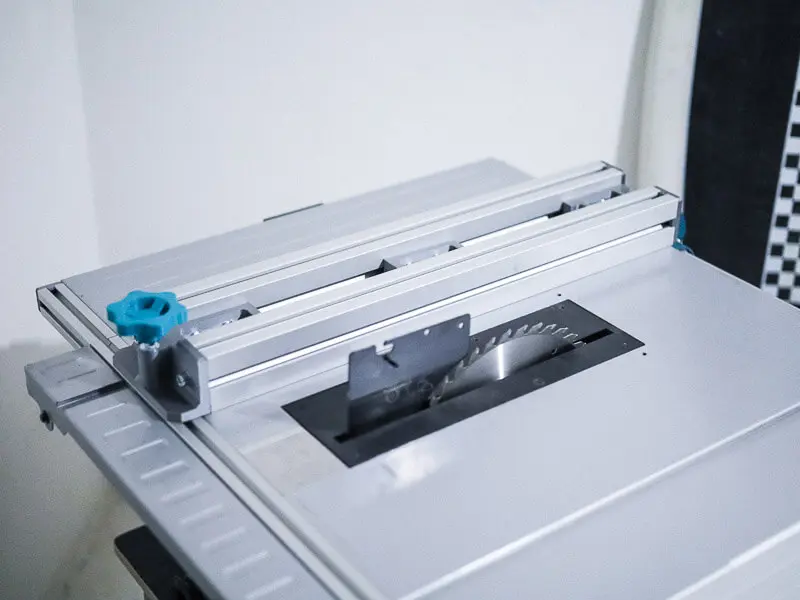
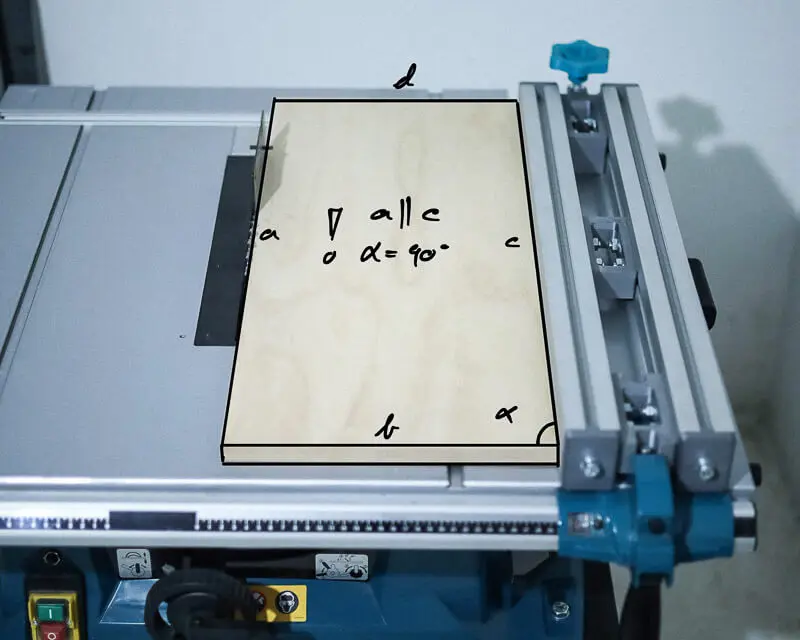
Calibrating
- Place the rip fence in the rails in the front- and back-end of the table.
- Loose the two bolts connecting the handle and guide.
- Place something perfectly square of shape (a piece of straight cut wood will do) between the blade and guide.
- Lock the front handle by pushing it down.
- Once the guide is perfectly aligned fasten the knob, and the two bolts form step 1.
- Make test cuts. Readjust, if necessary.
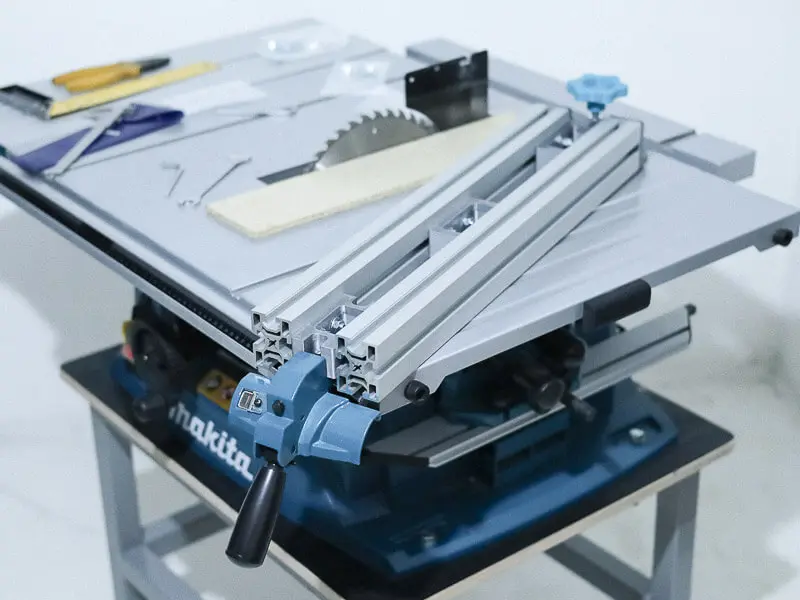
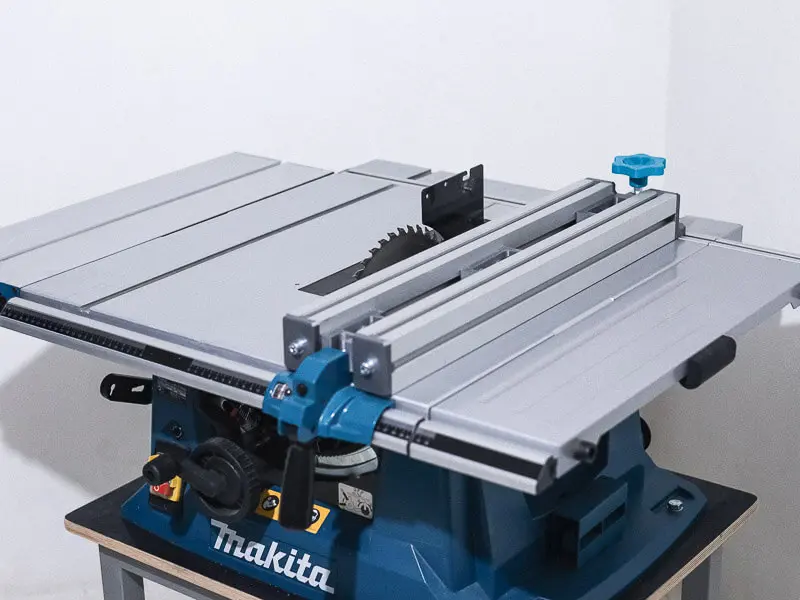
Conclusion
This is an elegant way to improve the Makita MLT100N table saw. The improved rip fence is designed to cut wood panels straight and precisely. Aluminum has excellent tribological properties, meaning that workpieces won't get stuck during cutting. Additionally, the guide is well-proportioned and symmetrical, while the knob allows for easy adjustment of the cut's width. Depending on where you live, the total cost of the project is less than 100 EUR and takes about 30 minutes to complete.
Gallery